These 3 ingredient no bake protein cheesecake cups are a revelation for anyone seeking a simple yet decadent treat. This recipe transforms basic components into a creamy, satisfying dessert or post-workout snack without any baking required. It’s the perfect solution for a quick sweet craving.
Crafted with minimal fuss, these cups deliver all the beloved flavor of cheesecake with an added protein boost. They are remarkably adaptable, making them a go-to for busy individuals and health-conscious dessert lovers alike. Get ready to enjoy guilt-free indulgence with this effortless recipe.
Recipe Overview
| Prep Time | 10 Minutes |
| Cook Time | 0 Minutes |
| Total Time | 2 Hours 10 Minutes (includes chilling) |
| Servings | 6-8 cups |
| Difficulty | Easy |
| Cuisine | American |
Why This Recipe Works
I discovered the magic of these 3 ingredient no bake protein cheesecake cups when I was desperately searching for a quick dessert that also supported my fitness goals. Traditional cheesecakes are delicious but time-consuming and often loaded with sugar. This minimalist approach proved to be a game-changer, delivering that classic creamy tang without complex steps or lengthy baking times.
The beauty lies in its simplicity and the synergy of its few components. Cream cheese provides the essential rich, tangy foundation. Protein powder introduces a satisfying nutrient boost and helps thicken the mixture beautifully, eliminating the need for eggs or heavy cream. A touch of sweetener ensures balanced flavor, making it customizable to your preference.

This recipe works because it leverages the inherent qualities of high-quality ingredients. Full-fat cream cheese offers unparalleled creaminess and a luxurious mouthfeel that is crucial for a good cheesecake. Using a vanilla or unflavored protein powder ensures the cheesecake flavor shines through while providing the structure and protein punch we desire. The chilling process is the only ‘cooking’ step, allowing the flavors to meld and the texture to set perfectly. It’s a testament to how a few well-chosen ingredients can create something truly special and healthy.
Ingredients
| Ingredient | Quantity | Notes with alternatives |
| Cream Cheese | 16 oz (approximately 450g) | Full-fat is recommended for best texture and flavor. Use softened for easier mixing. For a lighter version, use light cream cheese, but texture may be slightly less rich. Ensure it’s not spreadable cream cheese, but the block variety. |
| Protein Powder | 1 scoop (approximately 30g) | Vanilla or unflavored whey, casein, or plant-based protein powder works best. Avoid highly flavored or colored powders initially to ensure the pure cheesecake taste. Casein or a blend often yields a thicker consistency. |
| Sweetener | 2 tbsp | Maple syrup, honey, agave, or a sugar-free alternative like erythritol or stevia drops. Adjust to taste. For a sugar-free option, use zero-calorie sweeteners. The amount is a starting point, always taste and adjust. |
Step-by-Step Instructions
Assembling these 3 ingredient no bake protein cheesecake cups is incredibly straightforward.

-
Prepare the Cream Cheese
Ensure your cream cheese is softened to room temperature. This is a critical step for achieving a smooth, lump-free mixture. Leave it on the counter for about 1-2 hours before you plan to start mixing.
-
Combine Base Ingredients
In a medium bowl, add the softened cream cheese. Add the scoop of vanilla or unflavored protein powder. Using a spatula or hand mixer on low speed, begin to thoroughly combine the cream cheese and protein powder until fully incorporated.
-
Incorporate Sweetener
Add the sweetener of your choice to the cream cheese and protein powder mixture. Start with the suggested amount, then taste and adjust according to your sweetness preference. Blend until evenly distributed and the mixture is smooth.
-
Portion into Cups
Divide the cheesecake mixture evenly among 6 to 8 small ramekins, mini muffin cups, or silicone muffin liners. You can also use small jars or glasses for a different presentation. Aim for consistent portion sizes for even chilling.
-
Chill to Set
Place the filled cups in the refrigerator. Allow them to chill for a minimum of 2 hours. This chilling time is essential for the mixture to firm up and develop the characteristic cheesecake texture. For a firmer set, chill for up to 4 hours.
-
Serve and Enjoy
Once set, your 3 ingredient no bake protein cheesecake cups are ready to be enjoyed. Serve them chilled, plain or with your favorite toppings.
Chef Tips for Perfect Results
- Soften Cream Cheese Thoroughly: Undermixing softened cream cheese is the primary cause of lumps. Let it sit at room temperature for at least 1.5 to 2 hours, or until yielding easily to gentle pressure. Microwaving briefly can work, but risks melting edges; use 10-second intervals with caution.
- Use a Good Quality Protein Powder: The flavor and texture of your protein powder significantly impact the final result. Opt for reputable brands with clean ingredients. Vanilla or unflavored varieties allow the authentic cheesecake taste to dominate, while other flavors might overpower it.
- Taste and Adjust Sweetness: Sweetener needs vary based on the protein powder used and personal preference. Always taste the mixture before chilling and add more sweetener gradually until it reaches your desired level of sweetness. Remember that chilled desserts often taste less sweet than at room temperature.
- Don’t Overmix if Using a Mixer: If using an electric mixer, blend only until just combined. Overmixing can incorporate too much air, which might lead to an undesirable texture when chilled, or cause the cheesecake to weep slightly. A spatula or wooden spoon is often sufficient.
- Chill Adequately: Patience is key for these no-bake cups. The 2-hour chilling period is a minimum; for a very firm set, let them chill for 4 hours or even overnight. This allows the ingredients to properly meld and the consistency to become perfectly cheesecake-like.
Common Mistakes to Avoid
- Using Cold Cream Cheese: Cold cream cheese will result in a lumpy cheesecake mixture that is difficult to smooth out. Fix: Ensure cream cheese is fully softened to room temperature before beginning.
- Adding Too Much Liquid Sweetener: If you add too much liquid sweetener, the mixture might become too thin to set properly. Fix: Start with the recommended amount and add more gradually, tasting as you go. If it’s too thin, you may need to add a bit more protein powder or chill longer.
- Using an Overly Flavored Protein Powder: A protein powder with a very strong or artificial flavor can overpower the delicate cheesecake taste. Fix: Stick to vanilla, unflavored, or a neutral protein powder for the most authentic cheesecake experience.
- Not Chilling Long Enough: Insufficient chilling means the cheesecake cups will not firm up properly, leading to a soft, unappealing texture. Fix: Adhere to the minimum 2-hour chilling time, and ideally, aim for a longer period for a truly well-set dessert.
Variations and Substitutions
| Ingredient | Substitution | Impact on Flavor |
| Cream Cheese | Greek Yogurt (full-fat, strained) + Ricotta Cheese (part-skim) | Slightly tangier, lighter texture. May require more chilling to firm up. |
| Vanilla/Unflavored Protein Powder | Chocolate or Strawberry Protein Powder | Changes the base flavor profile to chocolate or strawberry cheesecake. |
| Maple Syrup/Honey | Stevia, Erythritol, or Monk Fruit | Creates a sugar-free version. May have a slight cooling sensation or different sweetness profile depending on the choice. |
| 3 Ingredient Base | Add 1 tsp lemon zest or vanilla extract | Enhances the classic cheesecake flavor with bright citrus notes or deeper vanilla notes. |
Serving Suggestions and Pairings
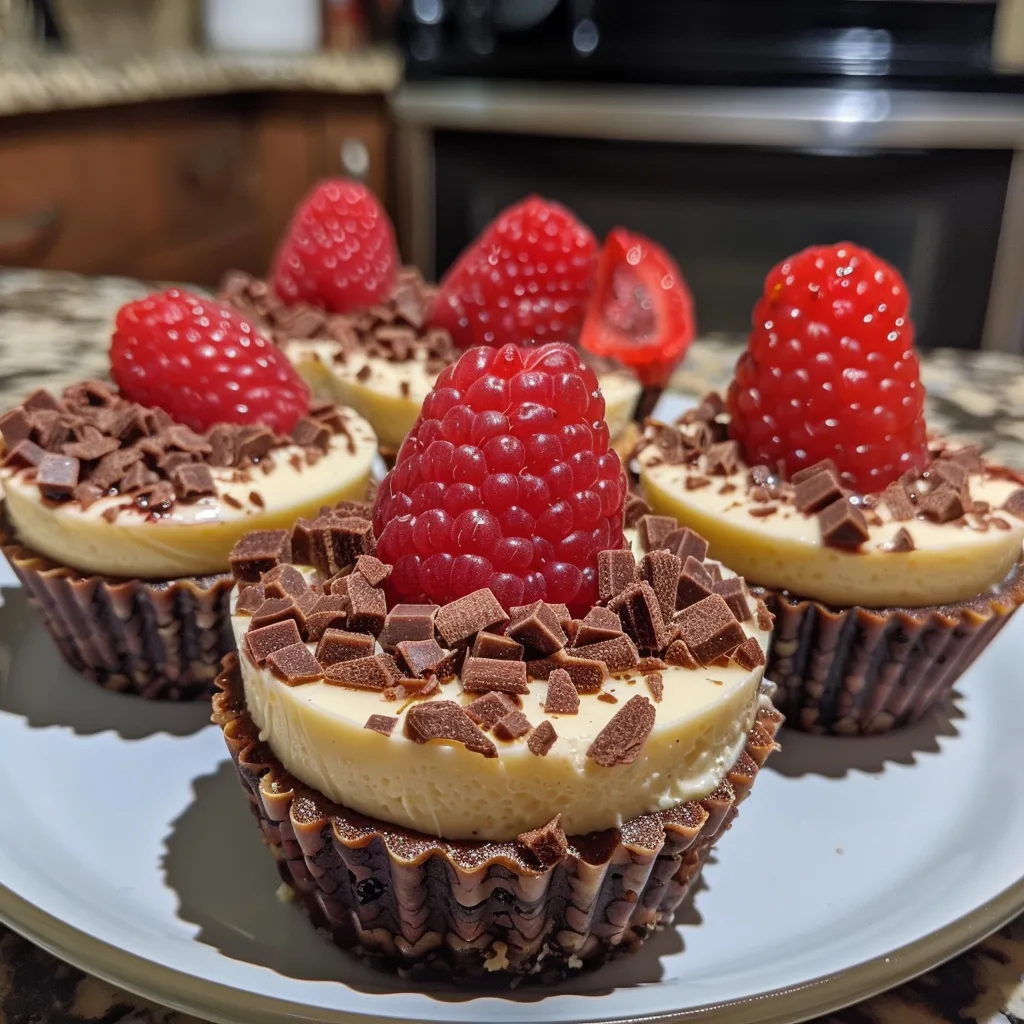
These 3 ingredient no bake protein cheesecake cups are delightful on their own but truly shine with thoughtful toppings. Fresh berries, such as strawberries, blueberries, or raspberries, add vibrant color and a burst of natural sweetness, creating a classic pairing. A sprinkle of chopped nuts like almonds or walnuts provides a welcome crunchy contrast to the creamy texture. For chocolate lovers, a drizzle of sugar-free chocolate syrup or a few dark chocolate shavings elevates the indulgence.
These cups are perfect for a healthy afternoon snack, a light dessert at the end of a meal, or even a pre/post-workout treat. They are suitable for nearly any occasion, from a casual weeknight indulgence to a more elegant gathering. Consider serving them at a brunch alongside fresh fruit or as part of a “dessert Charcuterie” board for a touch of elegance.
Storage and Reheating
| Method | Duration | Instructions |
| Refrigeration | 3-4 Days | Store in airtight containers or cover the ramekins directly with plastic wrap or foil. Keep in the refrigerator. The texture is best enjoyed within the first 2-3 days. |
| Freezing | Up to 1 Month | Freeze in airtight containers or freezer bags. It is best to freeze them individually portioned in liners to prevent sticking. Thaw in the refrigerator for several hours or overnight before consuming. Note that texture may be slightly softer upon thawing. |
| Reheating | Not Recommended | These are designed to be served cold. Reheating is not advised as it will melt the cheesecake texture and ruin the intended consistency. |
Nutritional Information
| Nutrient | Amount per Serving (Approximate values) |
| Calories | 200-250 kcal |
| Protein | 10-15g |
| Fat | 15-20g |
| Carbohydrates | 5-10g |
| Fiber | 0-1g |
| Sugar | 3-7g |
| Sodium | 100-150mg |
Approximate values. Actual nutritional content will vary based on specific ingredients, brands, and portion sizes used.
Frequently Asked Questions
Can I substitute the cream cheese?
Greek yogurt or a blend of cottage cheese and Greek yogurt can be used as a substitute, but results may vary. Full-fat cream cheese provides the richest, most stable texture for no-bake cheesecake.
How do I know if my no-bake protein cheesecake cups are done?
The cups are done when they are firm to the touch and hold their shape. They should not be jiggly or overly soft. Sufficient chilling time is key to achieving the correct firmness.
My cheesecake mixture is too thin, what should I do?
If the mixture is too thin, it likely means the cream cheese was not softened correctly, or too much liquid sweetener was added. Try adding a little more protein powder or chilling for an extended period to firm it up.
Can these 3 ingredient no bake protein cheesecake cups be made ahead?
Yes, these cups are excellent for making ahead. They can be prepared up to 3-4 days in advance and stored in the refrigerator in an airtight container. They may even improve in flavor as they sit.
What is the best way to serve these protein cheesecake cups?
Serve these protein cheesecake cups chilled directly from the refrigerator. They are best enjoyed plain or with fresh fruit, a drizzle of sugar-free sauce, or a sprinkle of nuts for added texture and flavor.
These 3 ingredient no bake protein cheesecake cups are a testament to simple, satisfying dessert making. They prove that you don’t need a long ingredient list or hours in the kitchen for a truly delicious treat. Embrace the ease and enjoy the creamy, protein-packed goodness. They are a perfect example of how simple ingredients create a delightful outcome.
Print
3 Ingredient No Bake Protein Cheesecake Cups
Creamy, no-bake protein cheesecake cups made with just three simple ingredients. Perfect as a post-workout snack or sweet treat, these offer a rich, guilt-free indulgence with a protein boost and minimal prep time.
- Total Time: 130
- Yield: 6-8 cups 1x
Ingredients
16 oz (450g) full-fat cream cheese
1 scoop (30g) vanilla or unflavored protein powder
2–3 tablespoons sweetener (e.g., powdered sugar, maple syrup, or honey)
Instructions
In a food processor or blender, combine cream cheese, protein powder, and sweetener until smooth and creamy.
Divide the mixture into 6-8 lined cupcake liners or small jars.
Chill for at least 2 hours to set.
Notes
Use softened cream cheese for smoother mixing
For a lighter texture: substitute light cream cheese or non-dairy alternative (e.g., coconut cream)
Adjust sweetener to taste
Chill up to overnight for thicker consistency
Store in an airtight container in the fridge for up to 3 days
- Prep Time: 10
- Category: No-Bake Dessert Recipes
- Method: No Bake
- Cuisine: American
- Diet: Vegetarian
Nutrition
- Serving Size: 1 cup
- Calories: 150
- Sugar: 10g
- Sodium: 80mg
- Fat: 10g
- Saturated Fat: 6g
- Carbohydrates: 5g
- Fiber: 0g
- Protein: 15g
- Cholesterol: 30mg