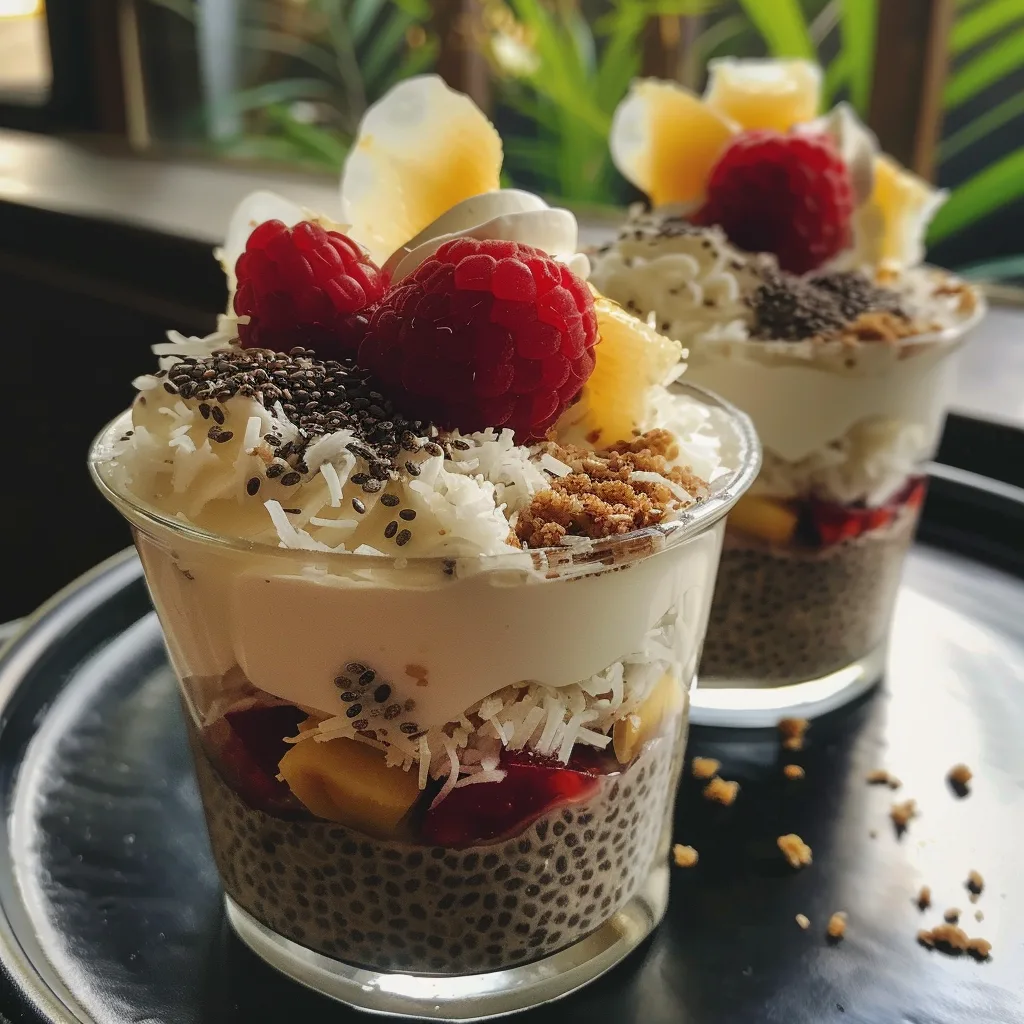
These No Bake Coconut Chia Dessert Cups deliver a creamy, flavorful, and healthy treat without any oven time. They are surprisingly simple to prepare, making them an ideal dessert for busy weeknights or last-minute entertaining. The natural sweetness and rich texture come from wholesome ingredients you can feel good about.

Why This Recipe Works
The magic of these no bake coconut chia dessert cups lies in the perfect ratio of coconut milk to chia seeds. Coconut milk provides a luscious, creamy base that sets beautifully, while the chia seeds swell and gel, creating a pudding-like consistency. This combination results in a dessert that is both satisfyingly dense and wonderfully smooth. I initially struggled with consistency in chia puddings, but the full-fat coconut milk is key to achieving that decadent mouthfeel, avoiding a watery or overly stiff result. The natural sweetness from the maple syrup balances the subtle richness of the coconut.
What makes this recipe truly shine is its adaptability and inherent health benefits. Chia seeds are little powerhouses of fiber, omega-3 fatty acids, and protein, making these dessert cups a guilt-free indulgence. The lack of baking means no complex cooking processes, just simple assembly and chilling. This makes it incredibly accessible for beginners and a lifesaver when you need a quick dessert. The vibrant tropical flavor profile of coconut is universally loved and easily enhanced with other fruits or flavorings. This recipe is a testament to how simple, whole ingredients can create something truly spectacular and healthier than many traditional desserts.
Ingredients
| Ingredient | Quantity | Notes with Alternatives |
|---|---|---|
| Full-Fat Coconut Milk | 1 cup | Use the thick cream from the top of a chilled can for richest texture. Light coconut milk can be used but will result in a less creamy dessert. Ensure it’s unsweetened. |
| Chia Seeds | 1/4 cup | Black or white chia seeds work interchangeably. Adjust slightly based on desired thickness; more seeds will result in a firmer set. |
| Maple Syrup | 2 tablespoons | Adjust to your preferred sweetness. Honey, agave nectar, or date syrup are suitable alternatives. For a sugar-free version, use stevia or erythritol, adjusting to taste. |
| Vanilla Extract | 1 teaspoon | Pure vanilla extract offers the best flavor. Vanilla bean paste or a scraped vanilla bean can also be used for a more intense vanilla note. |
| Shredded Unsweetened Coconut | 1/4 cup | Adds texture and enhances the coconut flavor. Desiccated coconut or lightly toasted coconut flakes are good substitutes. |
| Optional Toppings | As needed | Fresh berries, sliced mango, passion fruit pulp, toasted coconut flakes, a sprig of mint. |
Step-by-Step Instructions
Follow these straightforward steps to create your delicious no bake coconut chia dessert cups.
- In a medium bowl, whisk together the full-fat coconut milk, chia seeds, maple syrup, and vanilla extract until well combined.
- Allow the mixture to rest for 5 minutes to hydrate the chia seeds.
- Whisk the mixture again thoroughly to break up any clumps of chia seeds and ensure a smooth consistency.
- Gently stir in the shredded unsweetened coconut until evenly distributed throughout the base.
Phase 1: Mixing the Base
- Divide the coconut chia mixture evenly among 4 small serving glasses, ramekins, or jars. Aim for consistent portion sizes for uniform setting.
- Cover each serving cup securely with plastic wrap to prevent any surface film from forming.
- Refrigerate the cups for at least 2 hours. For a firmer set, chilling for 4-6 hours or overnight is recommended.
Phase 2: Chilling and Setting

- Once the pudding has reached the desired consistency, remove the plastic wrap.
- Garnish the no bake coconut chia dessert cups generously with your chosen toppings.
- Serve immediately and enjoy this light yet satisfying dessert.
Phase 3: Serving
Chef Tips for Perfect Results
- Use Full-Fat Coconut Milk: Always opt for full-fat canned coconut milk. The high fat content is crucial for achieving a thick, creamy, and indulgent texture that sets properly. Light coconut milk will result in a thinner, less satisfying pudding.
- Double Whisking Method: After the initial whisking, let the mixture sit for about 5 minutes, then whisk vigorously a second time. This second whisk is vital for preventing clumps of chia seeds and ensuring a completely smooth, uniform pudding.
- Adjust Sweetness Gradually: Taste the mixture before chilling and adjust the maple syrup (or alternative sweetener) as needed. Remember that flavors can slightly mellow after chilling, so aim for a taste that is just right.
- Proper Chilling Time: Do not rush the chilling process. Chia seeds need ample time to absorb the liquid and create their gelatinous structure. A minimum of 2 hours is required, but 4-6 hours or overnight yields the best, firmest set.
- Even Portioning: Distribute the mixture evenly into your serving vessels. This ensures that each cup sets at the same rate and provides a consistent serving size with an appealing presentation.
Common Mistakes to Avoid
- Using Too Little Coconut Milk: This leads to a dry, crumbly texture rather than a smooth pudding. Always adhere to the specified liquid-to-seed ratio; if a thicker result is desired, add 1-2 tablespoons more coconut milk.
- Skipping the Second Whisk: Failing to whisk the mixture again after 5-10 minutes is a common oversight. This step is essential to break up any clumping seeds that may have settled at the bottom, preventing an uneven texture.
- Not Chilling Long Enough: Impatience is the enemy of perfect chia pudding. If you serve the dessert too early, it will be watery. Refrigerate for the full recommended time for optimal firmness.
- Using Aggressively Flavored Milks: Sweetened or heavily flavored non-dairy milks can overpower the delicate coconut flavor. Stick to unsweetened, plain varieties for the best base flavor profile.
Variations and Substitutions
| Ingredient | Substitution | Impact on Flavor |
|---|---|---|
| Full-Fat Coconut Milk | Almond Milk, Soy Milk, Oat Milk | Less creamy, lighter flavor. Almond milk has a subtle nutty taste. Oat milk is slightly sweeter. Soy milk can have a distinct bean note. |
| Maple Syrup | Honey, Agave Nectar, Date Syrup | Honey adds floral notes. Agave is neutral. Date syrup provides a deeper, caramel-like sweetness. |
| Shredded Unsweetened Coconut | Desiccated Coconut, Toasted Coconut Flakes | Desiccated is finer. Toasted coconut adds a nutty, roasted dimension and crunch. |
| Vanilla Extract | Almond Extract, Orange Zest, Cardamom | Almond extract adds a marzipan-like flavor. Citrus zest adds brightness. Cardamom introduces warm spice notes. |
| Base Mixture | Blend in 1/4 cup mango puree or 2 tbsp cocoa powder | Mango adds tropical fruitiness. Cocoa powder creates a chocolate version. |
Serving Suggestions and Pairings
These no bake coconut chia dessert cups are incredibly versatile. Serve them as an elegant yet simple dessert after a light meal, perhaps a grilled fish or a vibrant quinoa salad. They are perfect for brunches, picnics, or as a healthy afternoon snack. For special occasions like birthdays or holidays, elevate them with colorful toppings like fresh raspberries, blueberries, or a drizzle of mango coulis. They also pair beautifully with a simple fruit salad or a tropical smoothie. Consider serving them in small, clear glasses to showcase their appealing layered look, especially when topped with contrasting colors.
Storage and Reheating
| Method | Duration | Instructions |
|---|---|---|
| Refrigeration | 3-4 days | Store covered in airtight containers in the refrigerator. The texture may firm up slightly over time; stir gently before serving if necessary. |
| Freezing | Up to 1 month | These are best enjoyed fresh, but can be frozen. Place in freezer-safe containers. Thaw overnight in the refrigerator. The texture may change slightly upon thawing, becoming softer. |
Nutritional Information
Approximate values per serving (without additional toppings):
| Nutrient | Amount per Serving |
|---|---|
| Calories | 250-300 kcal |
| Protein | 5-7 g |
| Fat | 20-25 g |
| Carbohydrates | 15-20 g |
| Fiber | 8-10 g |
| Sugar | 7-10 g |
| Sodium | 10-20 mg |
Frequently Asked Questions
Can I use a different type of milk for these no bake coconut chia dessert cups?
Yes, other plant-based milks like almond, soy, or oat milk can be used. However, full-fat coconut milk provides the creamiest texture and richest flavor, which is ideal for this recipe.
What does it mean if my chia pudding is too thin?
Your chia pudding is likely too thin because it was not chilled long enough or the ratio of liquid to chia seeds was too high. Ensure you chill for at least 2-4 hours and consider adding 1-2 teaspoons more chia seeds per cup if you consistently find it too thin.
How can I make my coconut chia pudding taste better?
Enhance the flavor by adding extracts like almond or lime, spices like cardamom or cinnamon, or by blending in fruit purees such as mango or passion fruit. Ensure you use good quality vanilla extract and unpasteurized coconut milk.
Are these no bake coconut chia dessert cups keto-friendly?
This specific recipe is not strictly keto due to the maple syrup and inherent carbohydrates in chia seeds. To make it keto-friendly, substitute the maple syrup with a keto-approved sweetener like erythritol or stevia, and be mindful of optional fruit toppings.
Can I prepare the no bake coconut chia dessert cups in advance?
Yes, these dessert cups are perfect for make-ahead preparation. They can be made up to 3-4 days in advance and stored in the refrigerator, making them an excellent choice for meal prepping or entertaining.
These No Bake Coconut Chia Dessert Cups are a testament to the beauty of simple, wholesome ingredients. They offer a delightful balance of creamy texture and tropical flavor, proving that healthy desserts can be both easy and incredibly delicious. Embrace the simplicity, customize with your favorite toppings, and savor this satisfying treat that highlights the wonderful goodness of coconut and chia. Enjoy making and sharing these delightful cups!
Print
No Bake Coconut Chia Dessert Cups
Creamy, healthy no-bake dessert cups made with chia seeds, coconut milk, and maple syrup. Quick to prepare and perfect for a guilt-free treat with a tropical twist.
- Total Time: 240
- Yield: 4 servings 1x
Ingredients
1 cup full-fat unsweetened coconut milk
1/4 cup chia seeds
2 tablespoons maple syrup
1 teaspoon pure vanilla extract
1/4 cup shredded unsweetened coconut
Fresh fruit or granola (for toppings)
Instructions
In a medium bowl, whisk together coconut milk, chia seeds, maple syrup, and vanilla extract until fully combined.
Cover and refrigerate for at least 4 hours or until the mixture thickens into a pudding-like consistency.
Layer the chilled chia pudding into serving cups, topping each with shredded coconut.
Add optional toppings like fresh fruit or granola before serving.
Notes
Use the thick cream from chilled coconut milk for optimal texture.
For a nut-free version, avoid granola or use certified nut-free alternatives.
Store in airtight containers in the refrigerator for up to 3 days.
- Prep Time: 5
- Category: No-Bake Creamy Desserts
- Method: No-Bake
- Diet: Vegetarian
Nutrition
- Serving Size: 1 cup
- Calories: 240
- Sugar: 5g
- Sodium: 35mg
- Fat: 14g
- Saturated Fat: 12g
- Carbohydrates: 12g
- Fiber: 5g
- Protein: 4g
- Cholesterol: 0mg