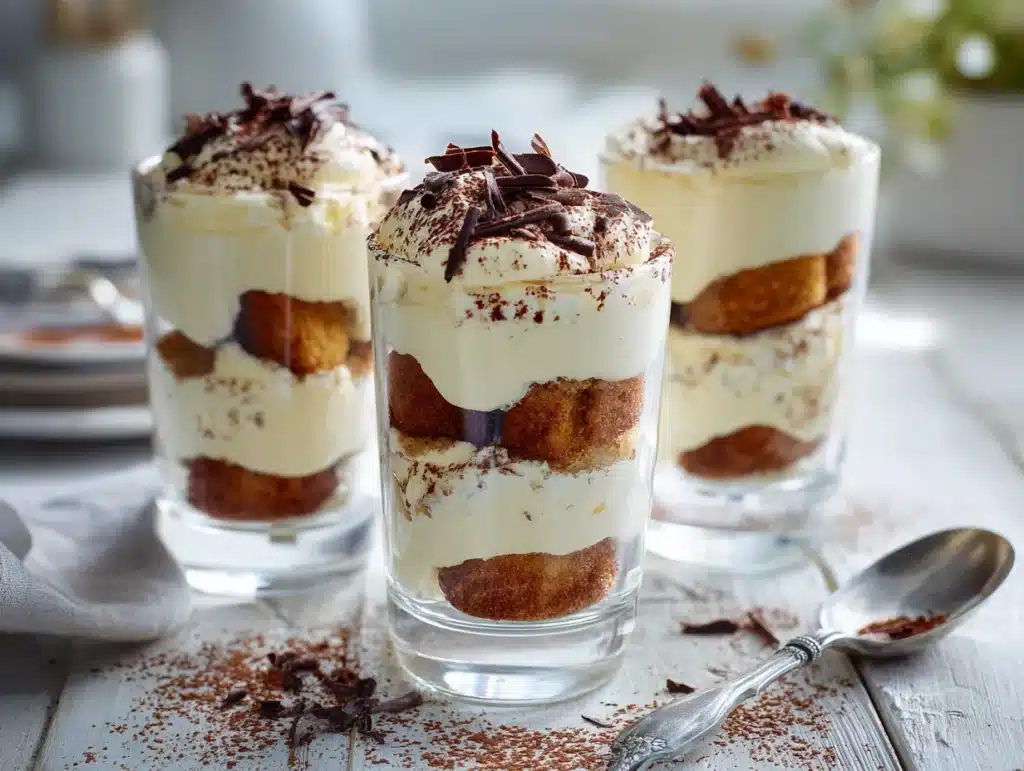
If you love classic Italian desserts, this no-bake tiramisu cups recipe will steal your heart. Imagine layers of espresso-soaked ladyfingers, velvety mascarpone cream, and cocoa dust all beautifully portioned into individual servings.
Tiramisu cups are everything we love about the classic Italian dessert just in a more adorable, mess-free form. These individual delights are part of a bigger tiramisu tradition you’ll find in The Ultimate Guide to Tiramisu, where you can explore its origins, authentic techniques, and creative twists that keep this dessert timeless.
I first discovered this idea while exploring the origins of tiramisu on Wikipedia, and I’ve been obsessed ever since. These cups bring all the elegance of traditional tiramisu, but with less mess and zero baking. Whether for brunch, dinner parties, or spontaneous cravings, these easy tiramisu cups deliver indulgence in every spoonful beautiful, practical, and utterly irresistible.

My Love Story with Tiramisu Cups (and Why They’re So Easy)
I’ll never forget the first time I served tiramisu in cups. It was a rainy Sunday, and I was preparing dessert for a last-minute family lunch. I didn’t have time to chill a full pan of tiramisu or slice it neatly, so I reached for some mini glasses, layered everything in, and hoped for the best. The result? Not only did they look like something out of a boutique café, but everyone loved having their own personal dessert. It felt thoughtful like each guest got something made just for them.
Since then, tiramisu cups have become my go-to for holidays and celebrations. They’re portion-controlled, prettier than a big tray, and perfect for customizing. I’ve made countless versions from tiramisu martini to our fan-favorite pistachio tiramisu, but nothing beats the charm and practicality of individual tiramisu cups.
Not to mention, they’re ideal for no-bake days when the oven just isn’t an option. Whether you’re making mini tiramisu for a party or a batch of Costco-inspired tiramisu cups at home, this format delivers everything you love just cuter.
How to Make No-Bake Tiramisu Cups – Step-by-Step Guide

What makes tiramisu cups so brilliant is how easy and mess-free they are to prepare. This version is a total no bake tiramisu, so you won’t need to turn on the oven, even on hot days. You just need a few mixing bowls, some patience for chilling, and a few delicious layers to build these beauties.
Start with the ladyfingers soaked briefly in a cooled espresso mixture. Don’t drench them; a quick dip gives the perfect texture inside each cup. Next, whip together mascarpone, cream, vanilla, and a touch of sugar until smooth and fluffy. This is the heart of your tiramisu cream. Spoon or pipe the cream into small jars or glasses, alternating with the espresso-soaked cookies.
If you want that extra visual flair, try building mini tiramisu cups in wine glasses or dessert tumblers. The layered presentation always impresses. Chill the cups for at least four hours overnight is even better. Just before serving, dust the tops with unsweetened cocoa powder and maybe add a few chocolate curls for that wow factor.
These tiramisu in a cup creations also store beautifully. You can prep them up to two days in advance, making them ideal for gatherings. For variation, try folding in pumpkin puree, matcha, or fruit compote like we did in our vibrant ube tiramisu and fresh strawberry tiramisu dessert.
They’re fun, adaptable, and seriously indulgent without the stress. That’s the magic of tiramisu cups.
Print
Tiramisu Cups – The Cutest No-Bake Dessert You’ll Fall in Love With
These creamy tiramisu cups are the perfect make-ahead dessert, layered with espresso-soaked ladyfingers and whipped mascarpone cream in elegant glass portions.
- Total Time: 4 hours 15 minutes
- Yield: 6 cups 1x
Ingredients
-
1 cup (225 g) mascarpone cheese, chilled
-
1 cup (240 ml) heavy cream, cold
-
1/3 cup (65 g) granulated sugar
-
1 teaspoon pure vanilla extract
-
1 cup (240 ml) strong brewed espresso or coffee, cooled
-
12–14 ladyfingers (savoiardi biscuits)
-
2 tablespoons unsweetened cocoa powder, for dusting
-
Chocolate shavings or curls, for garnish (optional)
Instructions
1. In a mixing bowl, beat mascarpone, heavy cream, sugar, and vanilla until thick and fluffy.
2. Quickly dip ladyfingers into the cooled espresso (don’t oversoak).
3. Place one or two soaked ladyfingers into the bottom of each glass cup.
4. Spoon a layer of the mascarpone mixture over the ladyfingers.
5. Repeat layering once more with dipped ladyfingers and mascarpone cream.
6. Smooth the tops and refrigerate the cups for at least 4 hours or overnight.
7. Before serving, dust each cup with cocoa powder and top with chocolate shavings.
Notes
Don’t soak the ladyfingers too long in espresso—they’ll fall apart.
You can substitute decaf espresso or use a coffee-flavored extract if needed.
For dairy-free, use coconut cream and dairy-free mascarpone alternatives.
- Prep Time: 15 minutes
- Cook Time: 0 minutes
- Category: Dessert
- Method: No-Bake
- Cuisine: Italian-American
- Diet: Vegetarian
Nutrition
- Serving Size: 1 cup
- Calories: 380
- Sugar: 18g
- Sodium: 60mg
- Fat: 28g
- Saturated Fat: 17g
- Unsaturated Fat: 9g
- Trans Fat: 0g
- Carbohydrates: 25g
- Fiber: 1g
- Protein: 5g
- Cholesterol: 120mg
Creative Ways to Customize Your Tiramisu Cups
Every time I make tiramisu cups, I realize how versatile they really are. They’re one of those desserts that adapts to the moment whether you’re prepping for a birthday, a dinner date, or just treating yourself on a lazy Sunday afternoon.
One of my favorite tricks is to serve individual tiramisu cups in mismatched glassware. Not only does it make each one feel special, but it also lets me get creative with the layers and textures. The more visible the contrast between the cream and soaked biscuits, the better.
On busier days, I fall back on shortcuts that still taste amazing. I call these my easy tiramisu cups. Using store-bought elements and prepping a day ahead means I can have dessert ready in minutes without sacrificing flavor. Honestly, no one ever knows they weren’t made from scratch.
If you enjoy experimenting, you’ll love how these cups respond to flavor swaps. A sprinkle of cardamom, a spoonful of raspberry jam, or even a layer of crushed nuts can completely transform your tiramisu dessert cups into something bold and exciting.
Curious to go even further? You might enjoy the gentle twist in this matcha tiramisu, or the fruity elegance of strawberry tiramisu dessert. Both are proof that the classics can evolve and still delight.
In the end, these cups are more than a recipe. They’re a way to express creativity in the most delicious way possible.
How to Serve and Store Individual Tiramisu Cups
When I prepare desserts in advance, there’s nothing more convenient or satisfying than single-serve portions. Whether it’s a cozy dinner or a family brunch, mini tiramisu always feels just right. The presentation is charming, and guests love having their own little cup to dig into.
I like to use small glass jars or clear tumblers. They showcase the layers beautifully and are easy to stack in the fridge. Before serving, I sprinkle cocoa powder or even some grated dark chocolate over the top it adds that final, professional-looking touch.
If you’re prepping for a crowd, these individual tiramisu desserts can be made the night before and chilled until you’re ready. In fact, I think the flavor deepens after a few hours. The layers settle, and the cream blends more smoothly with the espresso-soaked biscuits.

For extra variety, I sometimes switch things up with playful alternatives. The lemon blueberry cupcakes on my blog offer a fruity counterpoint, while the carrot cake cookies bring in those warm, spiced notes perfect for pairing with coffee-based desserts.
Storage is simple: seal each portion with a lid or plastic wrap and refrigerate. If needed, they’ll keep well for up to 3 days. Though in my house, they rarely last that long.
What I love most? They’re elegant enough for celebrations, yet easy enough to enjoy anytime.
FAQ – Common Questions About No-Bake Tiramisu Cups
What’s a simple way to make a tiramisu cups recipe?
If you’re new to this dessert, start by layering espresso-dipped ladyfingers and a sweet mascarpone mixture into small cups. Top with cocoa powder and refrigerate for several hours. It’s a no-bake treat that looks elegant and tastes like it came from a fancy bakery.
Can I prepare tiramisu in a jar instead of regular cups?
Yes, and it’s one of my favorite tricks. Wide-mouth jars are great for layering and transporting. They work beautifully for events or as edible gifts. You can also pair them with recipes like this strawberry tiramisu dessert for variety.
How long can tiramisu dessert cups recipe be stored?
Once assembled, store them in the fridge, covered, for up to 3 days. I actually find they taste better the next day—the flavors settle and become even more balanced.
What’s the best version for an individual tiramisu?
Use smaller glasses or ramekins to build single portions. Not only are they cute and practical, but they also avoid waste. For guests with dietary needs, try gluten-free versions with custom ladyfingers.
Can I make tiramisu cups without eggs?
Yes! This recipe skips raw eggs entirely by using whipped cream and mascarpone for a creamy texture.
What’s the best coffee for tiramisu cups?
Strong espresso or dark roast coffee works best for rich flavor without excess liquid.
Can I freeze tiramisu cups?
You can! Freeze them for up to 1 month. Thaw overnight in the fridge before serving.
How long should tiramisu cups chill before serving?
At least 4 hours is ideal overnight is even better for flavor blending.
What toppings can I add to tiramisu cups?
Try cocoa powder, chocolate curls, crushed nuts, or fresh berries for a pretty finish.
Are tiramisu cups safe for kids?
Yes, if you use decaf coffee or a caffeine-free alternative. Perfect for family-friendly desserts.
Conclusion – The Magic of No-Bake Tiramisu Cups
Creating these no-bake tiramisu cups isn’t just about dessert it’s about crafting a personal, elegant experience in every layer. From the espresso-soaked ladyfingers to the creamy mascarpone filling, each spoonful celebrates the timeless charm of Italian desserts.
If this recipe has awakened your sweet tooth, don’t miss our other irresistible creations:
- Try our Pistachio Tiramisu for a nutty, elegant twist.
- Explore the fruity layers of the Strawberry Tiramisu Dessert a reader favorite.
- Balance the richness with Lemon Blueberry Cupcakes for a bright, citrusy contrast.
- Or discover vibrant colors and unique flavor in our Ube Tiramisu variation.
Want more inspiration? Head over to The Ultimate Guide to Tiramisu to explore the dessert’s origins, authentic Italian methods, and creative spins that keep tiramisu timeless.
Save this recipe, share it, and enjoy your own batch of homemade tiramisu cups no baking required! ☕🍰