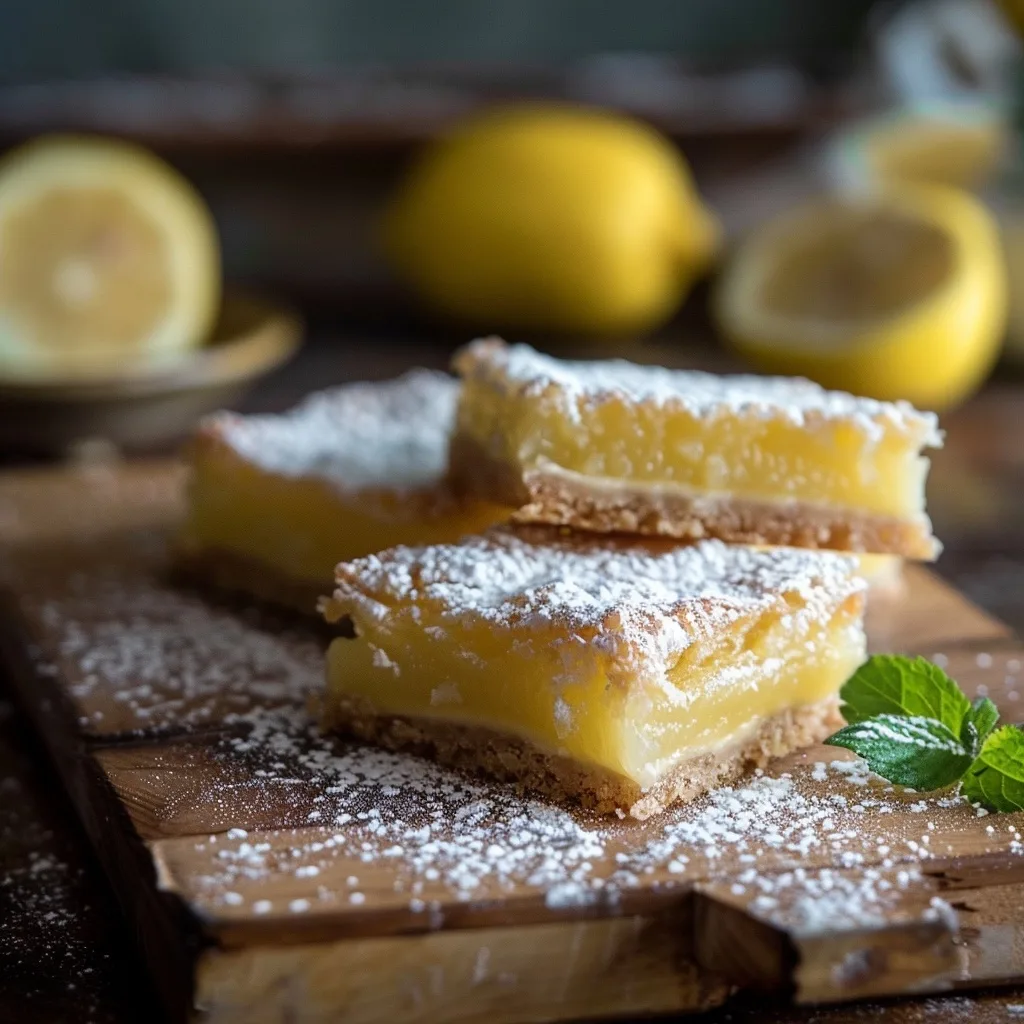
Super easy lemon bars deliver a perfect balance of tart and sweet, nestled on a buttery shortbread crust. This classic dessert is surprisingly simple to make, bringing a bright, citrusy flavor to any gathering or quiet afternoon treat. Achieve bakery-quality results with minimal effort.

Recipe Overview
| Prep Time: | 20 minutes |
|---|---|
| Cook Time: | 25-30 minutes |
| Total Time: | 45-50 minutes |
| Servings: | 16 bars |
| Difficulty: | Easy |
| Cuisine: | American |
Why This Recipe Works
This recipe is a triumph of simplicity and flavor. The shortbread crust requires only a few pantry staples and minimal mixing, forming a sturdy yet tender base. Its buttery richness perfectly complements the vibrant lemon filling. The magic truly happens when the tangy lemon curd sets, creating that signature, melt-in-your-mouth texture.
What makes these bars exceptionally beginner-friendly is the straightforward process. There’s no complex folding or delicate tempering. The custard-like filling is whisked together quickly and poured over the par-baked crust. Baking until just set results in a luscious, no-fuss dessert that consistently impresses.
Ingredients
| Ingredient | Quantity | Notes |
|---|---|---|
| All-purpose flour | 1 ½ cups | Can substitute with a gluten-free baking blend. |
| Granulated sugar | 1 cup (for crust) + 1 ½ cups (for filling) | Standard white sugar works best. |
| Unsalted butter | 1 cup (2 sticks), softened | Ensure butter is at room temperature for easy creaming. |
| Eggs | 4 large | Room temperature eggs incorporate more easily. |
| Lemon zest | 2 tablespoons | Zest from about 3-4 lemons, avoid the white pith. |
| Lemon juice | ½ cup | Freshly squeezed lemon juice is essential for bright flavor. |
| Baking powder | 1 teaspoon | Helps the crust achieve a tender texture. |
| Salt | ½ teaspoon | Enhances all the sweet and tart flavors. |
| Powdered sugar | For dusting (optional) | Adds a decorative and slightly sweeter finish. |
Step-by-Step Instructions
-
Prepare the Crust
Preheat your oven to 350°F (175°C). Line an 8×8 inch baking pan with parchment paper, leaving an overhang on the sides for easy removal.
-
In a medium bowl, whisk together the flour, 1 cup of granulated sugar, baking powder, and salt.
-
Add the softened unsalted butter to the dry ingredients. Using a pastry blender or your fingertips, cut the butter into the flour mixture until it resembles coarse crumbs with no large lumps of butter remaining.
-
Press the crumb mixture evenly into the bottom of the prepared baking pan to form a compact crust. Use the bottom of a glass or measuring cup to ensure an even layer.
-
Bake the crust for 15-20 minutes, or until lightly golden brown around the edges. Remove from the oven and let it cool slightly while you prepare the filling.
-
Make the Lemon Filling
In a separate large bowl, vigorously whisk together the 4 large eggs and 1 ½ cups of granulated sugar until well combined and slightly frothy.
-
Stir in the fresh lemon zest and ½ cup of fresh lemon juice, ensuring the zest is evenly distributed throughout the mixture.
-
Pour the lemon filling evenly over the warm, pre-baked crust. Gently spread it to the edges if necessary.
-
Bake and Cool
Return the pan to the oven and bake for an additional 25-30 minutes. The filling should be set around the edges and only slightly jiggly in the very center.
-
Carefully remove the pan from the oven and place it on a wire rack to cool completely. This will take at least 1-2 hours at room temperature.
-
Once completely cooled, refrigerate the lemon bars for at least 1 hour to allow the filling to firm up properly. This step is crucial for clean cuts.
-
Slice and Serve
Use the parchment paper overhang to lift the entire block out of the pan. Place it on a cutting board and dust the top with powdered sugar, if desired.
-
Cut the bars into 16 equal portions using a sharp knife. Wipe the knife clean between cuts for the neatest results.
Chef Tips for Perfect Results
- Use Fresh Lemons: Always opt for freshly squeezed lemon juice and zest. Bottled juice lacks the vibrant flavor essential for these bars.
- Don’t Overbake the Crust: A lightly golden crust is ideal. Overbaking can make it tough.
- Cool Completely: Patience is key. Refrigerating the bars until fully firm ensures clean, neat slices.
- Even Spreading: Ensure the lemon filling is spread evenly over the crust before baking the second time.
- Sharp Knife is Essential: A sharp, clean knife is crucial for slicing the chilled bars without them crumbling.
Common Mistakes to Avoid
- Using Room Temperature Butter for Crust: Melted butter makes the crust oily and tough, not crumbly and tender. Ensure butter is softened but not melted.
- Underbaking or Overbaking the Filling: Underbaking leaves the center too liquid; overbaking can cause it to crack and become dry. Bake until the edges are set and the center has a slight jiggle.
- Skipping the Chilling Step: The bars will be too soft to cut cleanly if not chilled sufficiently. This step firms the filling perfectly.
- Not Zesting Properly: Zesting only the yellow part of the lemon provides flavor without the bitter white pith.
Variations and Substitutions
| Ingredient | Substitution | Impact on Flavor |
|---|---|---|
| Lemon juice | Lime juice | Creates a slightly different, equally delicious tart flavor profile. |
| All-purpose flour | Gluten-free all-purpose flour blend | May result in a slightly different texture, but overall flavor remains similar. |
| Granulated sugar | Brown sugar (adjust amount) | Adds a hint of caramel notes, slightly less crispness. |
| Unsalted butter | Margarine (for crust) | Texture and richness may vary; flavor might be less complex. |
Serving Suggestions and Pairings
Serve these super easy lemon bars chilled for the best texture. They are a fantastic addition to picnics, potlucks, or afternoon tea. Pair them with a light, refreshing beverage like iced tea or a sparkling lemonade. For a more decadent experience, serve alongside fresh berries like raspberries or blueberries, or a dollop of whipped cream.
Storage and Reheating
| Method | Duration | Instructions |
|---|---|---|
| Refrigerator | 3-5 days | Store bars in an airtight container. They maintain their best texture when kept chilled. |
| Freezer | Up to 2 months | Wrap individual bars tightly in plastic wrap, then place in a freezer-safe container or bag. Thaw overnight in the refrigerator. |
Nutritional Information
| Nutrient | Amount per Serving |
|---|---|
| Calories | Approximate values. |
| Protein | Approximate values. |
| Fat | Approximate values. |
| Carbohydrates | Approximate values. |
| Fiber | Approximate values. |
| Sugar | Approximate values. |
| Sodium | Approximate values. |
Frequently Asked Questions
Can I use lime juice instead of lemon juice?
Yes, you can substitute lime juice for lemon juice. This will create a delicious lime bar with a similar tart yet refreshing flavor profile. Ensure you use fresh lime juice for the best results.
How do I know when the lemon bars are done baking?
The lemon bars are done when the edges of the filling are set and the center has only a slight jiggle. Avoid overbaking, which can lead to a dry or cracked filling.
My lemon bars are cracking, what did I do wrong?
Cracking usually occurs from overbaking or a drastic temperature change. Try reducing the oven temperature slightly and ensure you bake just until the center is set, not firm. Allow them to cool gradually.
Can I make these lemon bars ahead of time?
Absolutely. Lemon bars are best made a day in advance. Chilling them overnight allows the flavors to meld and the filling to set perfectly for slicing.
How should I serve these lemon bars?
Serve these lemon bars chilled, dusted with powdered sugar. They are wonderful on their own or paired with fresh fruits like berries. A light dusting of powdered sugar adds a beautiful finish.
These super easy lemon bars are a testament to how simple ingredients can create extraordinary taste. The zesty, sweet-tart filling combined with the buttery crust offers pure satisfaction. Enjoy crafting this delightful treat and savoring every bright, citrusy bite. It’s a perfect recipe to brighten any day.