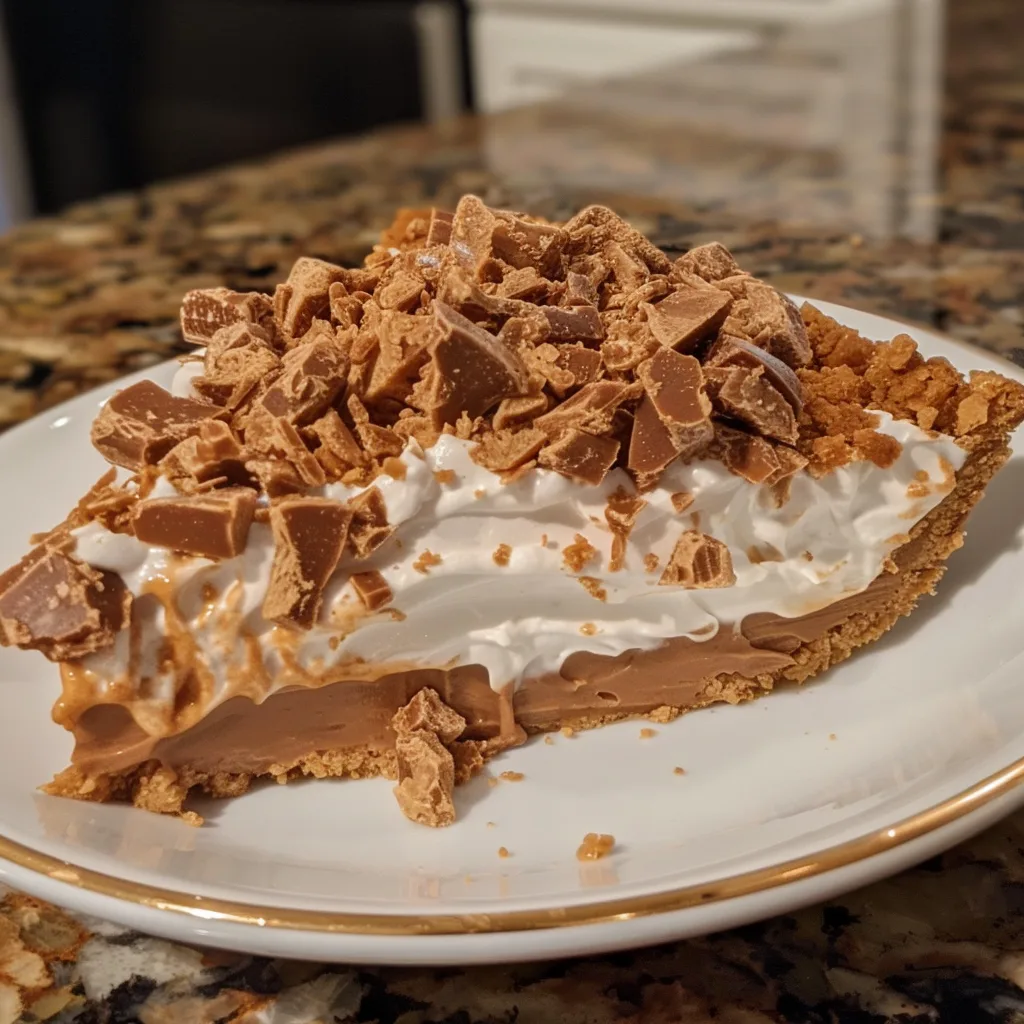
The no bake Butterfinger pie is a sensational dessert that masters effortless indulgence. This recipe delivers a luscious, creamy filling studded with the irresistible crunch of Butterfinger candy bars. It requires no oven time and minimal preparation, making it ideal for any occasion.
Recipe Overview
| Prep Time | 15 minutes |
|---|---|
| Cook Time | 0 minutes |
| Total Time | 4 hours 15 minutes (includes chilling) |
| Servings | 8 |
| Difficulty | Easy |
| Cuisine | American |
Why This Recipe Works
This no bake Butterfinger pie relies on simple ingredients that create fantastic texture and flavor. The blend of softened cream cheese and light whipped topping forms a perfectly smooth and airy filling. This creates a delightful contrast with the crisp, peanut-buttery shards of Butterfinger candy throughout.
Each bite offers that satisfying crunch that Butterfinger is known for, balanced by the sweet, cool creaminess of the pie. It’s a fuss-free approach to a decadent dessert that appeals to both kids and adults alike. You get all the flavor without any of the baking hassle.

Ingredients
| Ingredient | Quantity | Notes |
|---|---|---|
| Pre-made Chocolate Cookie Crust | 1 (9-inch) | A graham cracker crust also works well. Ensure it is fully set. |
| Butterfinger Candy Bars | 1 cup, chopped | You can use fun-size bars or full-size bars. Chop them into small, bite-sized pieces for even distribution. |
| Cream Cheese | 8 ounces | Must be softened to room temperature for smooth mixing. Use full-fat for best texture. |
| Powdered Sugar | 1/2 cup | Also known as confectioners’ sugar. Sifted, if lumpy. |
| Vanilla Extract | 1 teaspoon | Pure vanilla extract provides the best flavor. |
| Whipped Topping | 1 (8 ounce) container | Thawed. Cool Whip is a common choice. Ensure it is fully thawed but not deflated. |
Step-by-Step Instructions
Phase 1: Prepare the Filling
- Beat the softened cream cheese in a large mixing bowl until it is completely smooth and free of lumps. This ensures a silky texture.
- Add the powdered sugar and vanilla extract to the cream cheese. Beat these ingredients together until they are thoroughly combined and the mixture is fluffy.
- Gently fold the thawed whipped topping into the cream cheese mixture. Use a spatula and fold just until the ingredients are combined and no streaks remain. Avoid overmixing, which can deflate the topping.

Phase 2: Assemble the Pie
- Spoon the cream cheese filling evenly into the pre-made chocolate cookie crust. Spread it smooth with the back of a spoon or an offset spatula.
- Sprinkle the chopped Butterfinger pieces generously over the top of the filling. Ensure an even layer for consistent crunch in every slice.
Phase 3: Chill the Pie
- Cover the pie loosely with plastic wrap or foil. This prevents the surface from drying out.
- Refrigerate the pie for at least 4 hours, or preferably overnight. This chilling time is essential for the filling to set properly and for the flavors to meld.
- Before serving, you may garnish the pie with additional chopped Butterfinger pieces or chocolate drizzle. This adds visual appeal and extra flavor.
Chef Tips for Perfect Results
- Ensure cream cheese is truly at room temperature; cold cream cheese will result in a lumpy filling. Leave it on the counter for at least 1-2 hours.
- Do not overbeat the whipped topping when folding it in; this can cause the filling to become dense rather than airy. Gentle folding is key.
- Chop the Butterfinger bars finely. Larger chunks can sometimes be difficult to cut through, while smaller pieces distribute the flavor and crunch evenly.
- Chill the pie sufficiently. Rushing the chilling process means the pie won’t set properly and may be too soft when sliced. A minimum of 4 hours is crucial.
- Use a high-quality chocolate cookie crust. A sturdy crust is vital to hold the creamy filling and withstand slicing.
Common Mistakes to Avoid
- Using cold cream cheese: This leads to a lumpy filling that is unappealing in texture. Always ensure cream cheese is softened.
- Overmixing the filling: Overmixing the whipped topping can deflate it, resulting in a dense, heavy pie instead of a light, airy one. Fold gently until just combined.
- Not chilling long enough: A pie that isn’t chilled sufficiently will be too soft and difficult to slice cleanly. Proper chilling allows the filling to set firm.
- Using partially thawed whipped topping: If whipped topping is still icy or melted, it won’t incorporate properly, affecting the final texture. Thaw it completely but avoid letting it become liquid.
Variations and Substitutions
| Ingredient | Substitution | Impact on Flavor |
|---|---|---|
| Chocolate Cookie Crust | Graham Cracker Crust or Oreo Crust | Slightly less intense chocolate flavor, or a lighter, more traditional cookie base. |
| Butterfinger | Reese’s Peanut Butter Cups (chopped) | More intense peanut butter flavor, less crispiness. Halal option. |
| Butterfinger | Heath Bar (chopped) | Toffee and chocolate flavor profile, less peanut butter. |
| Whipped Topping | Homemade Stabilized Whipped Cream | Slightly less sweet, richer dairy flavor, potentially less stable if not prepared correctly. |
| Powdered Sugar | Maple Syrup (adjust for sweetness and consistency) | Slightly different sweetness profile, may affect filling texture if not balanced correctly. Monitor consistency. |
Serving Suggestions and Pairings
This no bake Butterfinger pie is especially delightful when served chilled as a dessert after a casual meal. It’s perfect for birthday celebrations, potlucks, or impromptu gatherings. Pair it with a glass of cold milk or a scoop of vanilla ice cream for an extra decadent touch. Consider a drizzle of chocolate sauce or caramel just before serving to enhance its rich flavors.
Storage and Reheating
| Method | Duration | Instructions |
|---|---|---|
| Refrigeration | 3-4 days | Cover the pie tightly with plastic wrap or aluminum foil. Store in the refrigerator. The texture may soften slightly over time. |
| Freezing (not recommended for best texture) | Up to 1 month | Wrap the pie very tightly in plastic wrap, then in aluminum foil. Thaw in the refrigerator for several hours before serving. Texture may become slightly watery. |
Nutritional Information
Approximate values per serving:
| Nutrient | Amount per Serving |
|---|---|
| Calories | 350 kcal |
| Protein | 4g |
| Fat | 20g |
| Carbohydrates | 38g |
| Fiber | 1g |
| Sugar | 28g |
| Sodium | 250mg |
Frequently Asked Questions
Can I use a different crust for this no bake Butterfinger pie?
Yes, absolutely. A graham cracker crust or a homemade Oreo crust provides excellent alternatives. Ensure the crust is pre-baked and cooled if required by its recipe, or use a pre-made no-bake variety.
How do I know if my no bake Butterfinger pie is set?
The pie is set when the filling is firm to the touch and does not jiggle excessively when the dish is gently nudged. It should hold its shape when sliced.
What if my filling is too soft?
If your filling is too soft, it most likely needed more chilling time; try refrigerating it for a few more hours. Ensure your whipped topping was fully thawed but not deflated, and that the cream cheese was properly softened.
Can I make this Butterfinger pie ahead of time?
This pie can indeed be made ahead of time. It is best when chilled for at least 4 hours, making it an ideal make-ahead dessert for parties or busy days.
How do I serve a no bake Butterfinger pie?
Serve this pie chilled directly from the refrigerator. Use a sharp knife that has been dipped in hot water and wiped dry for clean slices, ensuring the toppings don’t get messy.
Embrace the simplicity and incredible taste of this no bake Butterfinger pie. It’s a guaranteed crowd-pleaser, offering that perfect balance of creamy smoothness and crunchy, peanut-buttery goodness. This recipe proves that you don’t need a hot oven to create an unforgettable dessert experience. Enjoy every delightful bite of this iconic candy bar transformed into pie perfection.
Print
No Bake Butterfinger Pie Perfection
A no-bake American dessert combining creamy cream cheese, whipped topping, and chopped Butterfinger candy for a rich, crunchy, and effortless indulgence. Perfect for parties or quick gatherings, this pie requires no oven time and has a velvety texture.
- Total Time: 255
- Yield: 8 servings 1x
Ingredients
1 (9-inch) pre-made chocolate cookie crust (or graham cracker crust)
1 cup chopped Butterfinger candy bars (bite-sized pieces)
8 ounces cream cheese (full-fat, softened)
1/2 cup powdered sugar (sifted, if lumpy)
1 teaspoon pure vanilla extract
1 (8-ounce) container whipped topping (cooling, thawed but firm)
Instructions
Beat softened cream cheese until smooth and lump-free.
Add powdered sugar and vanilla extract; beat until fully combined.
Gently fold in whipped topping until no streaks remain.
Incorporate chopped Butterfinger candy bars, folding carefully to distribute evenly.
Pour the filling into the prepared crust.
Chill for at least 4 hours until set.
Serve slightly chilled.
Notes
Use a pre-made crust for minimum effort
Stir gently to avoid deflating the whipped topping
Customize with sprinkles or additional pressed candy shards on top
Store in an airtight container in the refrigerator for up to 3 days
- Prep Time: 15
- Category: No-Bake Dessert Recipes
- Method: No Baker
- Cuisine: American
- Diet: Vegetarian
Nutrition
- Serving Size: 1 slice (assumes 8 slicers
- Calories: 380
- Sugar: 22g
- Sodium: 800mg
- Fat: 18g
- Saturated Fat: 10g
- Carbohydrates: 34g
- Fiber: 1g
- Protein: 5g
- Cholesterol: 60mg