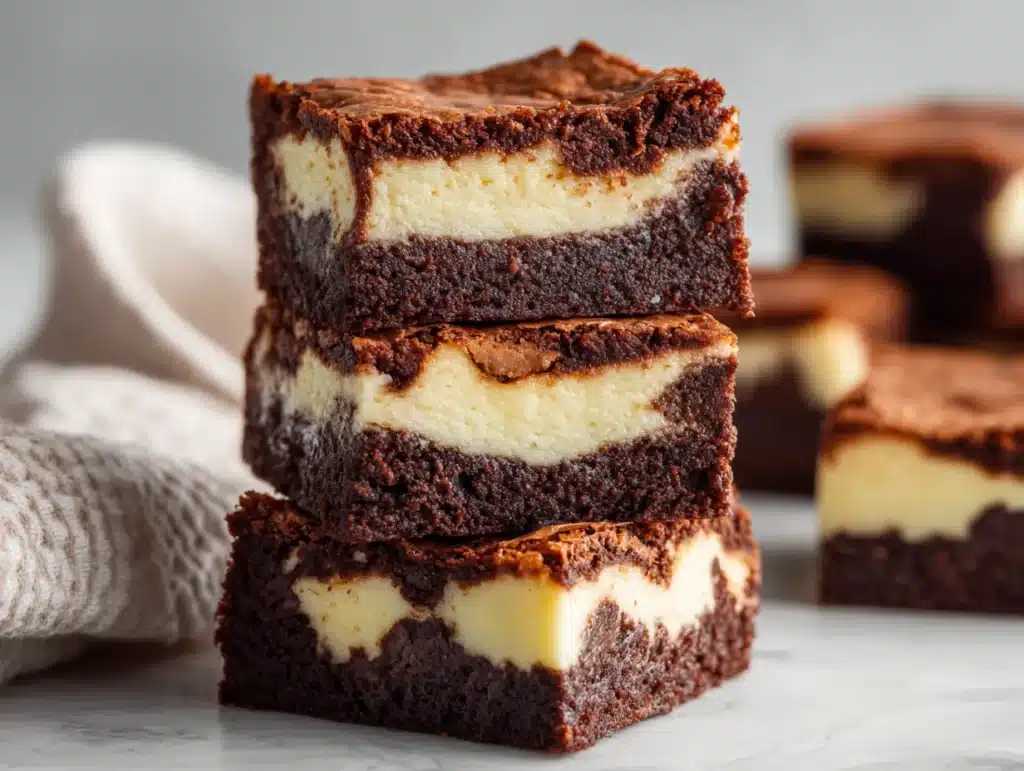

There’s something magical about cheesecake brownies — the moment you slice into that swirled beauty, revealing rich chocolate beneath a silky cheesecake top. I remember the first time I made these at home: I had leftover cream cheese from a frosting recipe, a bar of dark chocolate in the pantry, and a serious craving for something indulgent. What came out of the oven was so good, it became an instant family favorite.
Here at tiramisucake.com, our recipes reflect the spirit of home cooking passed down through generations. James, our virtual chef inspired by real kitchen wisdom, crafts every dessert with a balance of nostalgia and precision. And these cheesecake brownies? They’re the ultimate marriage of two desserts Americans love most: brownies and cheesecake. In this post, you’ll get everything you need — clear ingredients, easy steps, and expert tips — to bake a perfect batch, all while following safe cooking standards as outlined by the USDA.
Whether you’re baking for a party or just want a cozy weekend treat, these cheesecake brownies deliver. Let’s dive into what makes them so irresistible.
What Makes Cheesecake Brownies So Popular?
The Best of Both Desserts in One Bite
You don’t have to choose between creamy and chocolaty — cheesecake brownies give you both. These bars layer a fudgy brownie base with a smooth cream cheese mixture on top, then swirl the two together into a marble-like masterpiece. The result? A dessert that looks gourmet, tastes indulgent, and feels surprisingly easy to make.
Their beauty lies in the contrast. That slightly crisp top gives way to a melt-in-your-mouth center, with the tanginess of the cheesecake balancing the richness of the chocolate. It’s the kind of bite that makes you pause, close your eyes, and savor.
And yes — they’re just as good cold from the fridge the next day, maybe even better.
Why They’re a Social Media Favorite
It’s no surprise that brownie cheesecake bars have gone viral on platforms like TikTok and Instagram. Their marbled tops and dramatic layers are made for close-up shots and recipe reels. But beyond the aesthetics, they’re an easy win in any kitchen.
Unlike some elaborate baked goods, these are beginner-friendly. No water baths, no delicate chilling process like with a full cheesecake — just swirl, bake, cool, and slice. With just one bowl for each layer and a bit of care, you’ll have a tray of show-stopping homemade brownies in under an hour.
Want to explore more swirl desserts? Our Tiramisu Cheesecake is another crowd-pleaser that blends classic flavors with stunning results.
And if you’re craving something fruity next, don’t miss our Strawberry Cake and Cheesecake recipe — a fresh, summery twist on this creamy combo.
So whether you’re baking to impress or just treating yourself, these cheesecake brownies deliver big flavor with minimal effort. In the next section, we’ll walk through the ingredients — and why each one matters.
What Ingredients Do You Need for Cheesecake Brownies?

Ingredient Breakdown and Why Each One Matters
To make truly irresistible cheesecake brownies, you need a balance of richness, structure, and contrast. Here’s exactly what you’ll need, and why each ingredient earns its place in the recipe.
| Ingredient | Purpose |
|---|---|
| Unsalted butter | Creates a rich, melt-in-your-mouth texture in the brownie base. |
| Dark chocolate (60–70%) | Builds a deep, complex chocolate flavor and contributes to the fudgy texture. |
| Dutch-processed cocoa powder | Adds intense color and flavor; it’s less acidic, which complements the cheesecake swirl. |
| Granulated sugar | Sweetens and gives that classic shiny, crackly brownie top. |
| Brown sugar | Adds moisture and a subtle caramel flavor. |
| Large eggs + 1 extra yolk | Provides structure, binds ingredients, and contributes to chewiness. |
| Vanilla extract | Enhances both chocolate and cheesecake layers with warm depth. |
| All-purpose flour | Light structure without making the brownies cakey. |
| Espresso powder (optional) | Deepens the chocolate notes without tasting like coffee. |
| Salt | Balances sweetness and sharpens flavor. |
| Chocolate chips or chunks | Adds gooey pockets of chocolate throughout the brownies. |
| Cream cheese (full-fat) | Essential for the luscious cream cheese topping. |
| One egg (for cheesecake layer) | Gives body to the cream cheese without making it runny. |
| Sugar (for topping) | Sweetens the cheesecake layer for perfect contrast. |
✅ Pro tip: Always use room temperature cream cheese for a silky, lump-free topping. Cold cream cheese doesn’t mix well and will ruin that smooth swirl.
Can You Make Ingredient Swaps?
Yes — within reason. Here are some smart and safe substitutions if you’re short on certain ingredients or baking for dietary needs:
- Butter: Can’t go wrong with real butter. But in a pinch, melted coconut oil (refined for neutral flavor) works too — just expect a slightly different texture.
- Flour: For gluten-free needs, you can use 1:1 gluten-free all-purpose flour. Avoid almond flour here as it won’t provide the same lift.
- Chocolate chips: Feel free to swap semi-sweet, milk, or even white chocolate chunks for variety. Try it with pistachio chocolate chip cookies leftovers too!
- Cream cheese: Only use full-fat blocks — not whipped or spreadable tubs. Plant-based alternatives haven’t been tested in this version.
- Dutch-processed cocoa: If you only have natural cocoa, it will work, but expect a slightly more acidic and lighter-tasting brownie.
Looking for a fruitier twist? Add a swirl of raspberry purée on top before baking, or take inspiration from our Strawberry Pound Cake for creative topping ideas.
How to Make Cheesecake Brownies Step by Step

Step 1: Prepare the Brownie Base
Start by melting ½ cup (1 stick) of unsalted butter and 4 oz of dark chocolate in a heatproof bowl over simmering water, or microwave in 30-second bursts. Stir until smooth.
Remove from heat and whisk in:
- ½ cup granulated sugar
- ½ cup packed brown sugar
- 2 large eggs + 1 egg yolk
- 1 tsp vanilla extract
- ¼ tsp salt
- 1 tbsp espresso powder (optional, but recommended)
Once combined, sift in:
- ½ cup all-purpose flour
- ¼ cup dutch-processed cocoa powder
Mix gently until just incorporated, then fold in ½ cup chocolate chips or chunks.
Reserve ⅓ of this batter — it will be used to create the signature swirled cheesecake topping.
Step 2: Make the Cheesecake Layer
In a separate bowl, beat together:
- 8 oz full-fat cream cheese (very soft, room temperature)
- ⅓ cup granulated sugar
- 1 large egg
- ½ tsp vanilla extract
- Pinch of salt
Mix until completely smooth and creamy. This is your luscious cheesecake layer, and it should be pourable but not runny.
Pro tip (E-E-A-T): Always scrape down the bowl and beat thoroughly to avoid lumps. If your cream cheese was too cold, your swirl will break and look curdled.
Step 3: Assemble the Layers
Line an 8×8-inch baking pan with parchment paper, leaving an overhang on two sides so you can lift the brownies out cleanly.
Spread the brownie base (the ⅔ portion) evenly into the pan.
Gently pour the cheesecake mixture on top of the brownie batter. Use a spatula to smooth the surface.
Now, drop spoonfuls of the reserved brownie batter across the cheesecake layer. Take a butter knife or skewer and drag it through the layers in swirling motions to create a beautiful swirled cheesecake topping.
Don’t over-swirl — less is more here. A few elegant strokes will create those bakery-style marbled patterns.
Want swirl inspo? Our Chocolate Strawberry Cake uses similar layering techniques for dramatic visuals.

Step 4: Bake Like a Pro
Preheat your oven to 350°F (175°C). Place the pan in the center rack and bake for 25 minutes, then reduce heat to 325°F (160°C) and continue baking for 20–25 minutes.
You’ll know it’s ready when:
- The edges are slightly puffed and golden.
- The center of the cheesecake barely jiggles (like a custard).
- A tester inserted into the brownie part comes out with a few moist crumbs.
Tip (E-E-A-T): Use a digital thermometer for perfect results. The center should reach about 190°F–200°F without overbaking the cheesecake layer.
Let the brownies cool in the pan for 30 minutes at room temperature. Then transfer the pan to the fridge and chill for at least 2 hours — chilling before slicing is crucial.
Why? It allows the layers to set fully and makes slicing easier without smearing the cheesecake.
Final Touches
Once chilled, lift the brownies using the parchment overhang. Use a long, sharp knife (wiped clean between cuts) to slice neatly into 16 squares.
Want to go fancy? Dust lightly with cocoa powder, drizzle with melted chocolate, or add a few fresh berries on top.
Looking for a more classic version? Our Ube Tiramisu offers another layered dessert with deep flavor and eye-catching presentation.
How to Store and Customize This Swirled Dessert
What’s the Best Way to Store Them?
These bars aren’t just delicious fresh — they’re also excellent for prepping ahead.
| Storage | Duration | Details |
|---|---|---|
| At room temperature | 1 day | Store in an airtight container if your kitchen is cool. |
| In the refrigerator | Up to 4 days | Keeps the creamy cheesecake layer firm and flavorful. |
| In the freezer | Up to 2 months | Wrap each square tightly and use parchment between layers. |
Pro Tip (E-E-A-T): Let frozen slices thaw in the fridge overnight for best texture and food safety — always a good practice aligned with USDA guidelines.
Customizing These Easy Dessert Bars
This swirled treat is already pretty perfect, but adding your personal twist makes it even better. Here are a few options:
- Berry swirl – Drop raspberry or blueberry purée into the top layer before baking for a fruity contrast.
- Nut additions – Stir chopped pecans or almonds into the base for extra crunch.
- Toppings – Try crushed cookies, chocolate curls, or toasted coconut before baking.
- Flavor fusions – Swirl in peanut butter or chocolate-hazelnut spread into the cheesecake layer for a rich finish.
Want something with more fruit or lighter texture? Try our Strawberry Pound Cake or switch it up with the Blueberry Coffee Cake recipe next time.

Answering Common Questions
Can I swap the brownie base with a box mix?
Yes, it’s possible. However, from a texture and taste standpoint, the homemade version creates much richer results.
Why is my cheesecake layer cracking?
Most likely, your cream cheese was too cold or the oven was too hot. Be sure it’s soft before mixing, and avoid overbaking.
What’s the trick to getting perfect swirls on top?
Work with smooth batters and use a butter knife to lightly drag through both layers for a beautiful marbled effect.
Do they slice better warm or cold?
Cold. Let the pan chill for a few hours, then use a sharp knife and wipe between each cut.
Can I make these in a larger pan?
Absolutely. Use a 9×13 inch dish for thinner brownie cheesecake bars and reduce the baking time accordingly.

Cheesecake Brownies That Taste Like a Dream – Easy & Fudgy Recipe
These cheesecake brownies are the perfect dessert bar: rich, fudgy, and swirled with a creamy cheesecake layer. Easy to make and totally irresistible.
- Total Time: 2 hours 10 minutes
- Yield: 16 squares 1x
Ingredients
½ cup unsalted butter
4 oz dark chocolate (60–70%)
½ cup granulated sugar
½ cup packed brown sugar
2 large eggs + 1 yolk
1 tsp vanilla extract
¼ tsp salt
1 tbsp espresso powder (optional)
½ cup all-purpose flour
¼ cup dutch-processed cocoa powder
½ cup chocolate chips
8 oz full-fat cream cheese
⅓ cup sugar (for cheesecake layer)
1 large egg (for cheesecake layer)
½ tsp vanilla extract (for cheesecake)
Pinch of salt
Instructions
1. Melt butter and chocolate together in a bowl.
2. Whisk in both sugars, eggs, yolk, vanilla, salt, and espresso powder.
3. Fold in flour, cocoa powder, and chocolate chips. Set aside ⅓ of the batter.
4. In another bowl, beat cream cheese, sugar, egg, vanilla, and salt until smooth.
5. Spread brownie batter into parchment-lined 8×8 pan.
6. Top with cheesecake mixture and drop spoonfuls of reserved brownie batter.
7. Swirl gently using a knife.
8. Bake at 350°F for 25 mins, then at 325°F for another 20–25 mins.
9. Cool 30 minutes, then refrigerate for at least 2 hours.
10. Slice, serve, and enjoy!
Notes
Always use room temperature cream cheese for a smooth swirl.
Let brownies chill before slicing to get clean edges.
Store in fridge for up to 4 days or freeze individually wrapped squares.
- Prep Time: 20 minutes
- Cook Time: 50 minutes
- Category: Dessert
- Method: Baking
- Cuisine: American
- Diet: Vegetarian
Nutrition
- Serving Size: 1 bar
- Calories: 260
- Sugar: 18g
- Sodium: 140mg
- Fat: 15g
- Saturated Fat: 9g
- Unsaturated Fat: 5g
- Trans Fat: 0g
- Carbohydrates: 30g
- Fiber: 2g
- Protein: 4g
- Cholesterol: 55mg
Final Thoughts
This recipe delivers everything you want from a layered dessert — soft chocolate base, creamy topping, and a swirl that makes every square feel special. With simple ingredients, reliable steps, and creative flexibility, it’s a go-to treat for bakers of all skill levels.
Looking for more ideas? Don’t miss our Easy Tiramisu Cake Mix Recipe for a no-fail creamy cake or explore texture and flavor with our Almond Nut Cake.