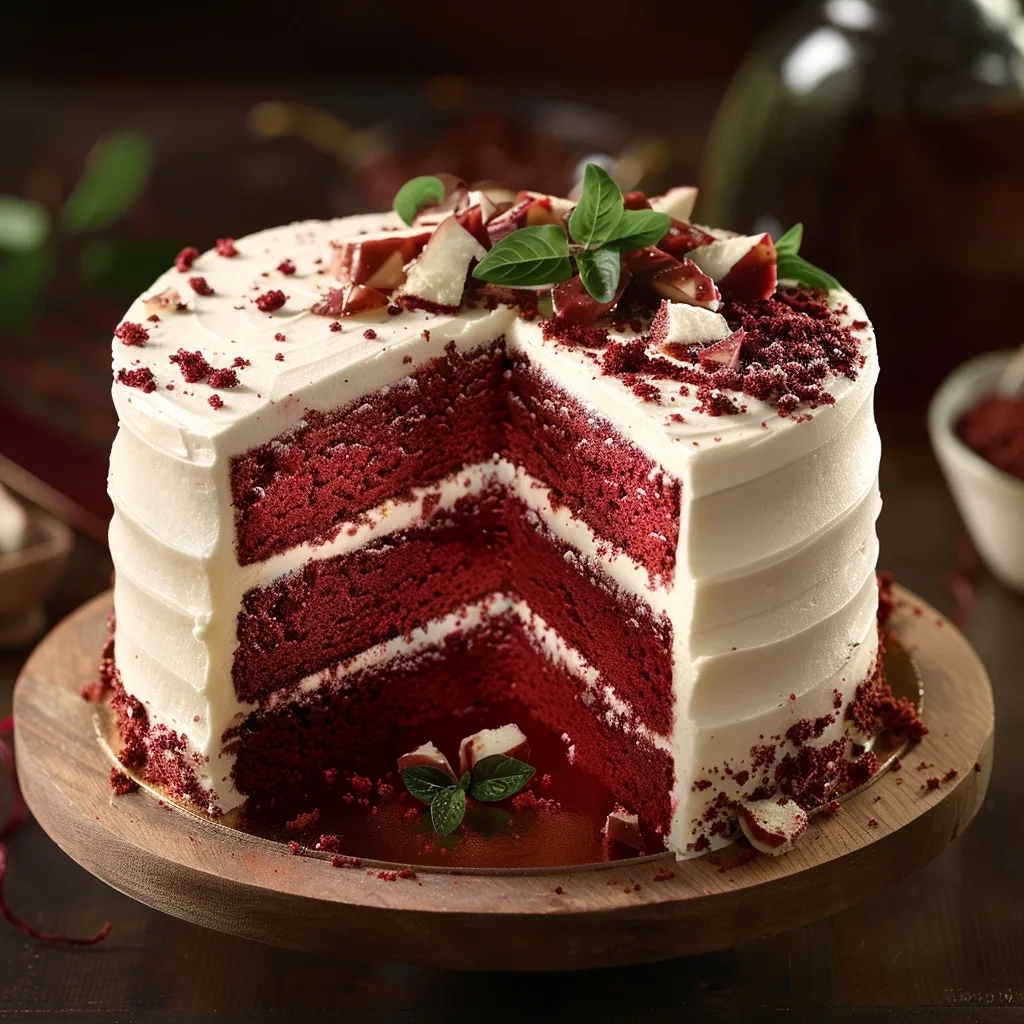
Master the art of baking a quintessential 3-layer red velvet cake from scratch with this foolproof recipe. Its rich cocoa flavor, vibrant color, and tender crumb make it an unforgettable dessert experience.
This easy classic red velvet cake 3 layers scratch recipe delivers a perfectly moist and decadent treat. You will achieve bakery-quality results in your own kitchen. It is designed for home bakers seeking an authentic flavor and stunning presentation.

Recipe Overview
| Prep Time | 30 Minutes |
|---|---|
| Cook Time | 30-35 Minutes |
| Total Time | 1 Hour 5 Minutes (plus cooling) |
| Servings | 12-16 |
| Difficulty | Easy |
| Cuisine | American |
Why This Recipe Works
This recipe works because it balances classic red velvet elements with simple techniques. The combination of buttermilk and vinegar creates a tender crumb through the reaction with baking soda. Unsweetened cocoa powder provides a rich, deep flavor without overpowering the other tastes. The precise ratios ensure a moist cake that is never dry.
My personal experience with this recipe highlights its reliability. I have made this easy classic red velvet cake 3 layers scratch countless times for family gatherings and celebrations. Each time, it is met with rave reviews for its texture and flavor. The secret lies in not overmixing the batter and ensuring all ingredients are at the correct temperature.
Ingredients
| Ingredient | Quantity | Notes with Alternatives |
|---|---|---|
| All-purpose flour | 2 ½ cups | Sifted for best results. |
| Granulated sugar | 1 ½ cups | White sugar is standard. |
| Baking soda | 1 teaspoon | Ensures leavening and reacts with acidic ingredients. |
| Salt | ½ teaspoon | Enhances overall flavor. |
| Unsweetened cocoa powder | 2 tablespoons | Natural unsweetened is preferred for better color and flavor. |
| Vegetable oil | ½ cup | Canola or other neutral oil works. Melted butter can be used for a richer flavor, but may alter texture slightly. |
| Buttermilk | 1 cup | Room temperature. To make homemade buttermilk, add 1 tablespoon of white vinegar or lemon juice to 1 cup of milk and let stand for 5 minutes. |
| Eggs | 2 large | Room temperature. |
| White vinegar | 1 teaspoon | Works with baking soda to create a light texture. |
| Vanilla extract | 1 teaspoon | Pure vanilla extract is recommended. |
| Red food coloring | 1-2 tablespoons | Gel food coloring provides a more vibrant color. Adjust to desired intensity. |
| Cream cheese frosting | 1 batch | Homemade or store-bought. Full recipe for frosting could be linked here [Link to Frosting Recipe]. |
Step-by-Step Instructions
Preparation
- Preheat your oven to 350°F (175°C). Grease and flour three 8-inch round cake pans. Line the bottoms with parchment paper for easy removal.
- In a large mixing bowl, whisk together the sifted all-purpose flour, granulated sugar, baking soda, salt, and unsweetened cocoa powder. Ensure no lumps remain in the dry ingredients.
Mixing the Batter
- In a separate medium bowl, whisk together the vegetable oil, room temperature buttermilk, room temperature eggs, white vinegar, vanilla extract, and red food coloring. Combine until uniformly mixed and the color is evenly distributed.
- Gradually add the wet ingredients to the dry ingredients, mixing on low speed until just combined. Do not overmix; a few small lumps are acceptable.
- Scrape down the sides and bottom of the bowl to ensure all ingredients are incorporated. Continue mixing briefly until the batter is smooth.
Baking the Cakes
- Divide the batter evenly among the three prepared cake pans. Use a kitchen scale for precision if desired.
- Bake for 30-35 minutes, or until a wooden skewer or toothpick inserted into the center of the cakes comes out clean. The cakes should spring back lightly when touched.
- Remove the cakes from the oven and let them cool in the pans for about 10-15 minutes. This allows them to set further before removing them.
- Invert the cakes onto a wire cooling rack. Carefully peel off the parchment paper. Allow the cakes to cool completely before frosting.
Frosting and Assembly
- Once the cakes are completely cool, prepare your cream cheese frosting if you haven’t already. Ensure the frosting is at a spreadable consistency.
- Place one cake layer on your serving plate or cake stand. Spread a generous layer of cream cheese frosting evenly over the top.
- Carefully place the second cake layer on top of the first. Add another even layer of frosting.
- Top with the third cake layer. Apply a thin crumb coat of frosting over the entire cake to trap any loose crumbs. Chill the cake for about 20-30 minutes to set the crumb coat.
- Apply the final, thicker layer of cream cheese frosting over the entire cake, smoothing the sides and top with an offset spatula. Decorate as desired.
Chef Tips for Perfect Results
- Use room temperature ingredients for the batter. This emulsifies better, resulting in a smoother, more consistent texture. Cold ingredients can cause the batter to curdle.
- Measure your flour correctly. Spoon flour into the measuring cup and level it off with a straight edge; do not scoop directly from the bag. This prevents a dense cake.
- Do not overmix the batter. Overmixing develops gluten, leading to a tough cake. Mix until just combined.
- Cool cakes completely before frosting. Warm cakes will melt the frosting, creating a messy and unstable structure. Patience is key here.
- Use gel food coloring for a more intense red hue. Liquid food coloring can alter the batter’s moisture content, potentially affecting the cake’s texture.
Common Mistakes to Avoid
- Overmixing the Batter: This develops too much gluten, resulting in a tough and dense cake. Mix only until the ingredients are just combined.
- Using Cold Ingredients: Cold eggs and buttermilk do not emulsify well with oil and sugar. This can lead to a greasy texture or a cake that doesn’t rise properly. Ensure all dairy and eggs are at room temperature.
- Opening the Oven Door Too Early: This causes a sudden drop in temperature, which can make your cakes collapse in the center. Wait until the cakes are nearly done before checking on them.
- Incorrect Flour Measurement: Scooping flour directly from the bag compacts it. This adds too much flour, making the cake dry. Spoon and level your flour for accurate results.
- Frosting Warm Cakes: Frosting a warm cake will cause the frosting to melt and slide off. Always ensure your cake layers are completely cooled before attempting to frost them.
Variations and Substitutions
| Ingredient | Substitution | Impact on Flavor |
|---|---|---|
| Vegetable oil | Melted unsalted butter | Slightly richer, buttery flavor profile. May result in a slightly denser crumb. |
| Buttermilk | 1 cup milk + 1 tbsp white vinegar (let sit 5 min) | Identical effect on texture and tenderness. Flavor neutral. |
| 2 tablespoons cocoa powder | 1 tablespoon unsweetened cocoa powder + 1 tablespoon dark chocolate cocoa powder | Deeper, more intense chocolate notes. |
| Standard frosting | Chocolate ganache frosting | Adds a richer chocolate flavor, complementing the cake. |
Serving Suggestions and Pairings
Serve slices of this easy classic red velvet cake 3 layers scratch at birthdays, anniversaries, or holidays like Valentine’s Day or Christmas. It pairs beautifully with a simple glass of cold milk or coffee. For a more decadent experience, serve with fresh berries like raspberries or strawberries. A dollop of whipped cream also complements its rich flavor.
Storage and Reheating
| Method | Duration | Instructions |
|---|---|---|
| Room Temperature Storage | 2-3 days | Store loosely covered in an airtight container or cake dome. |
| Refrigerated Storage | 4-5 days | Store in an airtight container. Bring to room temperature before serving for best texture. |
| Freezing | 2-3 months | Wrap cooled, unfrosted layers tightly in plastic wrap, then in foil. Thaw overnight in the refrigerator. Frost when fully thawed. |
Nutritional Information
| Nutrient | Amount per Serving |
|---|---|
| Calories | Approximate values, approx. 450 |
| Protein | Approximate values, approx. 5g |
| Fat | Approximate values, approx. 25g |
| Carbohydrates | Approximate values, approx. 50g |
| Fiber | Approximate values, approx. 2g |
| Sugar | Approximate values, approx. 35g |
| Sodium | Approximate values, approx. 300mg |
Frequently Asked Questions
How can I make red velvet cake moister?
Using buttermilk and oil in the batter contributes significantly to moisture. Ensure you do not overbake the cake layers, as this is the primary cause of dryness. Cool completely before frosting.
What is the best frosting for red velvet?
A classic cream cheese frosting is the traditional and most highly recommended pairing. Its tangy sweetness perfectly balances the mild chocolate flavor and rich cake texture. Other frosting options include a simple vanilla buttercream or a chocolate ganache.
Why is my red velvet cake not red?
Insufficient red food coloring is the most common reason. Ensure you use enough gel food coloring for vibrant results. The reaction between cocoa powder and baking soda can slightly mute the red color, so a good amount of coloring is necessary.
Can I make red velvet cake layers ahead of time?
Yes, completely cooled cake layers can be wrapped tightly in plastic wrap and then aluminum foil. Store them at room temperature for up to two days or freeze them for up to two months. Thaw overnight in the refrigerator before frosting.
How do I know if my red velvet cake is done?
A red velvet cake is done when a wooden skewer or toothpick inserted into the center comes out clean, with no wet batter clinging to it. The cake’s surface should also spring back lightly when gently pressed with a fingertip. Avoid overbaking.
This easy classic red velvet cake 3 layers scratch recipe is a dessert designed to impress. Follow these steps closely to achieve a moist, flavorful, and beautifully colored cake. The signature tangy cream cheese frosting enhances every bite. Enjoy baking this timeless classic!
Print
Easy Classic Red Velvet Cake 3 Layers Scratch
A tender, moist 3-layer red velvet cake with rich cocoa flavor and vibrant color. Perfect for special occasions, this easy-from-scratch recipe yields bakery-quality results with a reliable, foolproof method.
- Total Time: 65
- Yield: 12-16 servings 1x
Ingredients
2 ½ cups all-purpose flour
1 ½ cups granulated sugar
1 teaspoon baking soda
½ teaspoon salt
2 tablespoons unsweetened cocoa powder
½ cup vegetable oil
1 cup buttermilk (room temperature)
2 large eggs (room temperature)
1 teaspoon white vinegar
Food coloring (red, optional for enhanced color)
Powdered sugar (for topping)
Instructions
Preheat oven to 350°F (175°C). Grease and flour three 8-inch round cake pans.
In a large bowl, whisk together flour, sugar, baking soda, salt, and cocoa powder.
In a separate bowl, combine vegetable oil, buttermilk, eggs, and vinegar. Mix until well blended.
Gradually add wet ingredients to dry ingredients. Mix until just combined (avoid overmixing).
Divide batter evenly among prepared pans. Add a few drops of red food coloring if desired.
Bake for 30-35 minutes or until a toothpick inserted in the center comes out clean.
Cool layers completely in pans on wire racks.
Frost with preferred frosting (cream cheese or vanilla) between layers and on top. Optionally dust with powdered sugar for garnish.
Notes
Sift flour for a smoother texture.
Room temperature ingredients ensure even mixing.
Use natural unsweetened cocoa powder for optimal flavor and color.
Do not overmix batter to prevent dense crumb.
For a richer flavor, substitute melted butter for vegetable oil (1:1 ratio).
Store in an airtight container at room temperature for up to 2 days.
- Prep Time: 30
- Cook Time: 35
- Category: Classic American Cake Recipes
- Method: Baking
- Cuisine: American
- Diet: Vegetarian
Nutrition
- Serving Size: 1 slice (1/12 of 3-layer cake)
- Calories: 280
- Sugar: 25g
- Sodium: 180mg
- Fat: 12g
- Saturated Fat: 4g
- Carbohydrates: 36g
- Fiber: 1g
- Protein: 4g
- Cholesterol: 40mg